
App store screenshots play a vital role in attracting users, with over 1 million apps worldwide relying on them. Stock photo sites display more than 1.5 million results for "app store" searches, making it harder than ever to stand out.
Most developers overlook the power of compelling app store screenshots that drive conversion. Explore high-converting screenshot design to streamline this process. They spend countless hours perfecting their apps but rush through screenshot design. The Apple App Store logo and branding elements need careful attention based on specific guidelines. App Store badges come in 40 different localizations to expand your reach to broader audiences.
The design process doesn't need to be complex or time-consuming. You can automatically generate screenshots in all required sizes for both App Store and Google Play. This approach saves more than 10 hours of work and maintains consistency across platforms.
Our step-by-step tutorial will guide you to create professional app store screenshots in just 30 minutes. Explore professional screenshot creation tools to streamline this process. We'll show you how to design visuals that turn browsers into users, whether you're launching your first app or improving an existing one. Let's begin!
Step 1: Understand App Store Screenshot Guidelines
The rules are the foundation of creating great app store screenshots. Apple App Store and Google Play each have their own technical requirements that differ by a lot from each other.
Apple vs. Google Play requirements
Apple App Store runs a tighter ship than Google Play. You'll need at least one screenshot, with a max of ten for each supported device and language [1]. These must be .jpeg, .jpg, or .png files without transparency [1].
Apple has exact dimensions for iPhone screenshots:
- 6.7" iPhone: 1290 x 2796 pixels (portrait) or 2796 x 1290 pixels (landscape) [2]
- 6.5" iPhone: 1242 x 2688 pixels (portrait) or 2688 x 1242 pixels (landscape) [1]
- 6.1" iPhone: 1179 x 2556 pixels (portrait) or 2556 x 1179 pixels (landscape) [1]
- 5.5" iPhone: 1242 x 2208 pixels (portrait) or 2208 x 1242 pixels (landscape) [1]
iPad screenshots need specific dimensions too:
- 12.9" iPad Pro: 2048 x 2732 pixels (portrait) or 2732 x 2048 pixels (landscape) [1]
- 11" iPad Pro: 1668 x 2388 pixels (portrait) or 2388 x 1668 pixels (landscape) [2]
Google Play gives you more room to work with. You need at least two screenshots but can add up to eight for each device type (phones, tablets, Wear OS, and Android TV) [3]. The size requirements are more relaxed:
- Minimum dimension: 320 pixels
- Maximum dimension: 3840 pixels
- The maximum dimension can't be more than twice the minimum dimension [3]
You can use JPEG or 24-bit PNG formats, but skip the alpha transparency [3]. Google suggests uploading at least four screenshots with minimum 1080px resolution [3].
One key difference stands out. Google Play will scale your screenshots to fit different devices. Apple wants specific sizes for each device [4]. This means more work upfront with Apple, but your screenshots will look perfect on every device.
Common mistakes to avoid
Developers often stumble on some basic issues. Using wrong dimensions or formats tops the list of reasons why App Store Connect rejects uploads [5]. Apple won't accept random image sizes or custom dimensions [5].
Don't show features in screenshots that aren't in your app yet. Both stores see this as misleading, even if you plan to add them later [5]. Skip promotional text like "Download now," "Free," or discount claims - they'll get you rejected [5].
Each platform has its own guidelines. Poor contrast and readability can stop your screenshots from showing your app's true value [6]. Too much text overwhelms users who just want to scan quickly [6].
You get several screenshot slots - use them all. Each extra screenshot is a chance to show off another great feature [4].
Watch out for device-specific safe zones. These are areas where buttons or the status bar might hide your content [6]. Putting important elements there looks unprofessional and hurts your conversion rates.
Master these requirements early and you'll save time and dodge rejections later. Next up, we'll look at how to sequence your screenshots to tell your app's story effectively.
Step 2: Plan Your Screenshot Sequence
Screenshots serve as powerful storytelling tools that guide potential users through your app's value proposition. A well-planned sequence can boost your conversion rate significantly.
Telling a story through visuals
The best app store screenshots work as a unified story instead of individual graphics. You're building a visual storyboard that shows users your app experience [8]. This approach helps users picture themselves using your app before downloading.
The A.I.D.A. copywriting technique offers a solid framework to organize your screenshots [7]:
- Attention: First screenshot grabs immediate interest
- Interest: Second screenshot sparks curiosity about key features
- Desire: Middle screenshots highlight benefits and unique selling points
- Action: Final screenshots drive downloads through social proof or outcomes
Note that products solve problems. Your original screenshots should show how your app tackles specific user challenges [1]. To name just one example, instead of listing features, present them as solutions: "Tracking your favorite TV shows got complicated. My app makes it easy."
It also helps to keep visual elements consistent across screenshots. The same colors, typography, and layout strengthen your brand identity and guide users through your story [1].
Choosing the right order of screens
Screenshot sequence matters as much as content. Users pay the most attention to your first few app store screenshots [7]. So your most impressive feature or core value proposition belongs in the first image.
Your screenshots work best in this order:
- Primary screen showcasing main functionality or core value
- Standout feature that separates you from competitors
- Secondary features that demonstrate depth and value
- Social proof elements like reviews or awards (if applicable)
- Final impressive view that displays complete capabilities [5]
Different app categories need different screenshot approaches. Games should highlight actual gameplay [7]. Productivity apps might focus on interface and key features [8].
You might not need all available screenshot slots. Three outstanding screenshots often outperform a full set of average ones [5]. Build a tight narrative with your best screens rather than including everything.
Your app's orientation matters when planning the sequence. Screenshots should match how people use your app—portrait for social media and utility apps, landscape for many games and video apps [8].
Your screenshot sequence should highlight what makes your app unique. Test different arrangements through A/B testing to find what drives the highest conversion rates [9].
Step 3: Design for Your App Category
Different apps serve different needs. Explore drag-and-drop screenshot editor to streamline this process. Your app's category should guide your screenshot design to boost conversions. A visual approach that works well for a finance app might not work for a gaming app because user expectations differ between categories.
Finance vs. lifestyle vs. gaming
Finance Apps just need a visual language that builds trust right away. Screenshots typically show charts, balances, or payment processes with clean layouts. Calming color schemes feature blues and whites predominantly. Visual elements should convey security and professionalism because users trust these apps with their financial information. Revolut shows how to present money transfers or expense tracking with modern, uncluttered designs. Robinhood displays investment information through clean graphs that don't overwhelm users [10].
Wellness & Fitness Apps thrive on emotion and aspiration. Screenshots feature soft colors, gentle gradients, and images that spark specific feelings—calm, motivation, or energy. These apps take a different path from finance apps' data-focused approach. Calm and Headspace use peaceful nature scenes or soft illustrations that start delivering on their stress-reduction promise before users even download [10].
Gaming Apps take the opposite approach. They need screenshots that grab attention through vibrant energy. Their visual strategy uses bright colors, dynamic characters, and action-packed scenes to showcase the excitement users will experience. Clash Royale highlights battles and rewards with characters in mid-action to show the thrill of gameplay. Monument Valley uses its distinctive, surreal visual style to display its unique game world [10].
Productivity Apps need their own visual approach to show functionality and efficiency. Screenshots highlight clean interfaces, organizational features, and time-saving benefits through clear visual hierarchies and focused task flows.
What works best in each category
Understanding user priorities leads to effective category-specific screenshots. Finance apps should focus on security, clarity, and control. Users want to know their money stays safe, along with user-friendly interfaces that help them make smarter financial decisions [3]. Screenshots work best when they show expense tracking tools, investment insights with clean data visualization, and straightforward security features.
Lifestyle apps win by creating emotional connections through beautiful designs and aspirational imagery. Explore create app store screenshots in minutes to streamline this process. Dating, home decor, or fashion apps should display visuals that match users' desired self-image or values [3]. Successful screenshots in this category spark immediate emotional engagement rather than focusing only on functionality.
Gaming apps succeed best by showing the actual gameplay experience. Many games use landscape orientation to better display characters and environments. The goal remains simple: show what playing feels like [3]. The best screenshots highlight unique characters, special abilities, or exciting game moments that set your game apart.
Utility apps need a different strategy that puts clarity about core functionality first. Screenshots should show key features and selling points like ease of use or speed. They build trust by showing value rather than making emotional appeals [3].
Your screenshots should work like a "highlight reel" for your app—showing the best features that solve real-life problems for users [11]. A fitness app might show workout tracking first, then nutrition planning, and finally progress charts to highlight its detailed solution.
Note that creating a simple storyboard with sticky notes helps you visualize and rearrange ideas before starting design [11]. This method ensures your category-specific design choices match user expectations while showing your app's unique value.
Step 4: Use Visual Hierarchy to Guide Attention
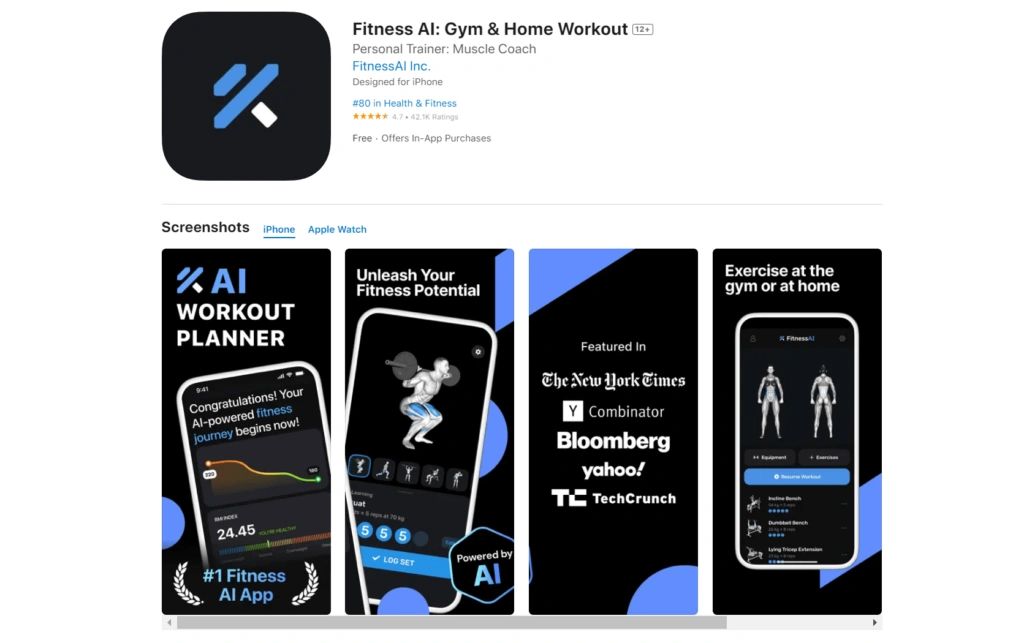 Image Source: Adapty
Visual hierarchy works like a silent language in your app store screenshots. Explore high-converting screenshot design to streamline this process. It guides users' eyes exactly where you want them to look. By 2025, all but one of these users won't scroll past the third screenshot [12]. This makes proper visual organization crucial for conversion.
Creating app store screenshots isn't about stuffing every feature in there. The goal is to direct attention to what matters most. A good visual hierarchy helps users learn about your app's value quickly.
Balancing text and visuals
The perfect text-to-image ratio remains one of the biggest challenges in app store screenshot design. Users get overwhelmed with too much text, while too little text leaves them confused about functionality [13]. Successful apps typically do this:
- Short, strong copy – Just 3-5 words per screenshot using this formula: Verb + Benefit + Result [12]
- Bold typography – Large, readable fonts stay visible even when screenshots show up in search results [4]
- Visual flow – A natural story progression between images [12]
TikTok and YouTube show this balance beautifully. They place screenshots in device frames against clean backgrounds with simple black text [14]. This keeps users focused on the app's interface while giving just enough context.
Your app's purpose should guide how you balance these elements. Finance apps need more text to explain complex features. Visual-heavy gaming apps can stick to imagery with minimal text overlay.
The "Ugly Ads" trend will gain popularity by 2025. Simple formats that look like user screenshots perform better than polished studio materials - they feel more real [12]. You might want to think over whether polished visuals or authentic representations will connect better with your audience.
Using contrast and spacing effectively
Contrast is your best tool to direct attention in app store screenshots. Our brains naturally notice differences, so contrasting elements signal importance right away [15].
These contrast principles work best:
Color needs strategic use. Save bright or saturated colors for important elements. Use less-saturated colors for secondary features [16]. This creates natural focal points naturally. The ideal contrast ratio between text and background is 4.5:1 - this helps most users read easily [6].
Size differences create instant hierarchy. Bigger elements grab more attention than smaller ones [15]. Stick to three sizes max (small, medium, and large) to keep clear relationships between elements [16].
Empty space works harder than any other screen element [6]. Strategic whitespace frames and highlights what matters. This prevents the cluttered look that drives users away. Uber shows this perfectly with stark contrast between text and dark backgrounds [4].
Visual hierarchy does more than look good - it drives conversion. Explore drag-and-drop screenshot editor to streamline this process. Good screenshots should walk your audience through main features and benefits in an appealing way [4]. Each design choice should make your app's value crystal clear.
A simple test can verify your visual hierarchy: squint at your design. Important elements should still stand out [6]. If they don't, you might need to rework your contrast and spacing.
Good visual hierarchy in app store screenshots shows your app's purpose and features instantly. Users understand what you offer without expanding each image [4]. This turns casual browsers into interested potential users by making your value impossible to miss.
Step 5: Incorporate Branding Elements
Your app store conversions depend heavily on brand recognition. Explore screenshot design secrets from top apps to streamline this process. A well-designed set of screenshots shows users what your app does. Your branding creates that lasting impression that sets you apart from competitors.
Using your app store logo and colors
Your color palette forms the foundations of your brand identity. Research shows it can boost recognition by up to 80% [17]. The colors you pick should match your app's purpose. Many financial and commercial apps use blues and greens. These colors signal trust, reliability, and stability [17]. Your palette should stick to about three core colors. This creates a clean, balanced look that users quickly recognize [17].
Typography matters just as much as colors for brand recognition. Your brand's signature font should appear in all app store screenshots. Just make sure it stays readable at any size and works with accessibility features like bold text and larger type [18].
Pick an accent color for interface elements like icons, buttons, and text [18]. This subtle detail ties your screenshots together without being overwhelming. Your brand elements should enhance the content rather than fight with the features you want to highlight [18].
The Apple App Store gives you specific badge artwork. These come with modifiers like "Download on the" and "Pre-order on the" in different languages. This helps you reach more users worldwide [19]. Apple's guidelines say you should use these badges correctly. The black badge works best in marketing materials. The white badge gives you more options when the black one looks too heavy [19].
Maintaining consistency with your app icon
Your app icon represents your brand's identity in its simplest form. Users see it everywhere - in search results, notifications, and system settings [2]. A good icon design shows what your app does across all platforms [2].
When designing your app icon for screenshots:
- Keep it simple—icons with tiny details can look messy with system shadows and highlights [2]
- Use vector graphics so everything stays sharp at any size [2]
- Make sure it looks the same across all platforms [2]
- Try using filled, overlapping shapes to add depth [2]
- Skip text unless your brand really needs it [2]
iOS app store icons need specific dimensions: 1024 x 1024 pixels in PNG format without transparency [20]. Google Play wants 512 x 512 pixels in 32-bit PNG format without alpha transparency [20].
Don't change your app icon too often. This hurts brand recognition and confuses users who know your current design [5]. Your icon should tell users what your app does through simple graphics and shapes. Photos, complex images, and too many letters don't work well [5].
Well-known brands should include their logo in the icon to boost credibility [21]. Newer brands should focus on a simple icon that shows what the app does [21]. Pick colors that match your brand identity. Stick to one or two main colors for the best effect [21].
Your branding elements should create a unified visual story across your app store screenshots. This builds trust and familiarity that guides users to download your app with confidence.
Step 6: Optimize for Conversion
Trust and credibility can make all the difference between users who download your app and those who keep browsing. Your app store screenshots can boost conversion rates and turn casual browsers into active users.
Using social proof or ratings
Trust drives downloads. About 80% of users check ratings and reviews before installing a new app [22]. More than 55% of users look at ratings before making in-app purchases, and over 70% say their brand impression comes directly from the average rating [22].
Visual social proof builds user confidence in several powerful ways:
- Display star ratings prominently – Apps that maintain 4+ star ratings see much higher conversion rates [23]
- Showcase authentic testimonials – Real user feedback proves your app's value [24]
- Incorporate media mentions – Strava showed how quotes from prominent publications like The Wall Street Journal add authority [25]
Without doubt, where you place social proof elements matters. Put testimonials, ratings, or review excerpts in your later screenshots – users who scroll past the first few images are already interested and closer to converting [25]. This smart positioning gives them the final push they need to download.
When apps have ratings below 3.5 stars, they show up less in keyword searches [23]. This makes strong ratings crucial for both conversion and discoverability.
Highlighting unique selling points
Your screenshots should showcase what sets your app apart from thousands of competitors. Each visual needs to highlight a specific aspect of your app's unique value.
Here's how to highlight your unique selling points:
- Identify your core differentiators – What problem does your app solve better than others? Speed, simplicity, exclusive features, or something completely different?
- Create a visual hierarchy – Design elements should draw eyes to your best features through size, color, and positioning
- Tell a logical story – Present your unique selling points in order: core value first, main feature second, other benefits third, social proof fourth, and a final call-to-action [25]
Good design combined with A/B testing helps find which unique selling points get the most engagement [26]. Different feature emphasis, layouts, or messages can help you find what appeals to your target audience.
Well-optimized app store screenshots that show your app's features and benefits can transform your conversion rates [3]. Time spent perfecting your social proof and unique advantages pays off – these elements often convince interested users to take action.
Step 7: Preview and Test Across Devices
Testing your app store screenshots before submission helps avoid rejection and ensures they look great on every device. Your screenshots might display differently on various screen sizes and orientations, even if they look perfect on your device.
Checking for cropping or alignment issues
Small cropping problems can make your app store screenshots look unprofessional. Text getting cut off, important UI elements vanishing at screen edges, or device frames covering vital content are common alignment issues. These problems show up when screenshots aren't optimized for each device size.
To spot potential cropping issues:
- Check text placement to keep it within safe zones
- Make sure important UI elements stay away from screen edges
- Confirm that device frames don't hide key features
- Look at all localized versions if your app supports multiple languages
Text overlays cause most cropping issues. You should keep consistent margins (at least 15-20% from edges) to stop text from getting cut off on different devices.
Testing on different screen sizes
Screen size variations create the biggest headaches. A perfect iPhone layout might break completely on a Samsung tablet [27]. Text gets cut off, buttons vanish, and layouts fall apart on different devices.
You need to test on multiple devices systematically. Tools like AppScreens and AppLaunchpad adjust screenshots to fit the right dimensions for each device and store [28]. These platforms update their device libraries often, so you can create screenshots using the newest device frames [29].
The core team should test on:
- Different iOS devices (various iPhone models and iPad sizes)
- Android phones and tablets of different dimensions
- Both portrait and landscape orientations where needed
The quickest way to test everything:
- Use Xcode simulators to test multiple devices without physical hardware [30]
- Run tests on real devices when possible for accurate results
- Use TestFlight to get real-life feedback [30]
Good preview and testing stop the frustration of app store rejections due to screenshot issues. Apps with well-tested screenshots look professional on any device your potential users might have. This attention to detail shows your steadfast dedication to quality and shapes users' opinion of your app before they download it.
Step 8: Export and Upload with Confidence
The success of your app store screenshots depends on proper preparation for submission. Your perfectly designed screenshots might face rejection if they don't meet platform-specific technical requirements or contain prohibited content.
Final checklist before submission
You should run through this checklist to prevent rejection before uploading your app store screenshots:
- Verify file formats and sizes – Apple accepts PNG (.png) and JPEG (.jpg/.jpeg) formats [8] at exact native pixel resolutions for each device. The platform doesn't allow arbitrary scaling
- Check against guidelines – Your screenshots must pass Apple's technical and content review as part of the overall app review process [8]
- Ensure screenshots match current UI – Screenshots that no longer reflect your app experience will lead to rejection [8]
- Remove placeholder content – Delete any "Lorem Ipsum" text or template images [31]
- Optimize file compression – Files need reasonable compression to upload faster and avoid processing issues [8]
- Review localized versions – Your localized screenshots must be complete if your app supports multiple languages
- Verify device-specific requirements – Each supported device type needs at least one screenshot [8]
Technical and content guideline violations will get your app submission rejected fast. This can delay launches or important updates [32].
Using automation tools to speed up the process
Several tools can make the export and upload process easier:
Specialized automation platforms can generate dozens of localized screenshots within minutes. This reduces screenshot production time by up to 80% [32]. These platforms connect to your design files and place screenshots into branded templates automatically. With AppDrift you can import designs directly from Figma and turn them into store-ready screenshots without leaving your workflow.
Apple's Media Manager lets you place all app screenshots for every locale and device size in one folder. You can then drag and drop them to upload [33]. Tools like Fastlane deliver offer another option - they detect screenshot devices by image size and upload them to App Store Connect with a single command [34].
Developers who work with code can use the App Store Connect API. It enables programmatic uploading through three steps: making an asset reservation, uploading the asset, and committing the reservation [35].
These automation tools save time and help meet exact specifications. Your team can focus on creative strategy instead of manual formatting tasks.
Conclusion
You can create effective app store screenshots in just 30 minutes without overwhelming your development schedule. This tutorial breaks down a potentially complex process into eight simple steps that anyone can complete.
Your screenshots act as visual salespeople that work around the clock to turn browsers into users. Each image tells a part of your app's story and guides potential users through a visual showcase that demonstrates your solution's advantages over competitors.
Understanding platform-specific requirements will help you avoid submission problems later. A well-planned screenshot sequence tells a compelling story instead of just showing random features. Your conversion rates will improve substantially when you customize your approach based on your app category.
The combination of visual hierarchy, consistent branding, and strategic optimization creates screenshots that look professional and boost downloads. Many developers skip the crucial final step of testing across multiple devices before submission.
The best app store screenshots balance functionality with emotional appeal. While implementing these techniques, you should focus on what users truly value rather than including every feature in your visuals.
You now have the tools to create compelling app store screenshots that transform casual browsers into loyal users. Take just 30 minutes to follow this process when you launch or update your app—your download numbers will show the difference.
Key Takeaways
Master the essentials of creating compelling app store screenshots that convert browsers into users with these actionable insights:
- Follow platform-specific guidelines precisely - Apple requires exact pixel dimensions while Google Play offers more flexibility, but both have strict format requirements that can cause rejection if ignored.
- Plan your screenshot sequence as a visual story - Use the first screenshot for your core value proposition, follow with standout features, and end with social proof to guide users toward download.
- Design for your specific app category - Finance apps need trust-building visuals with clean layouts, gaming apps require vibrant action shots, while lifestyle apps should create emotional connections.
- Apply visual hierarchy strategically - Use contrast, spacing, and the 4.5:1 text-to-background ratio to guide attention to key features without overwhelming users.
- Test across all device sizes before submission - Use automation tools and preview on multiple devices to prevent cropping issues and ensure professional presentation everywhere.
The difference between successful and failed app launches often comes down to these visual first impressions. Explore screenshot design secrets from top apps to streamline this process. Well-designed screenshots can dramatically boost conversion rates by immediately communicating your app's unique value proposition and building user confidence before download.
Frequently Asked Questions
How long should it take to create app store screenshots?
With proper planning and tools, you can create effective app store screenshots in about 30 minutes. This process involves understanding guidelines, planning your sequence, designing for your category, and optimizing for conversion.
What are the key differences between Apple App Store and Google Play screenshot requirements?
Apple has stricter requirements, demanding exact dimensions for each device type and allowing up to 10 screenshots. Google Play is more flexible, requiring only 2-8 screenshots within general size parameters and automatically scaling them for different devices.
How can I make my app store screenshots stand out?
To make your screenshots stand out, focus on telling a visual story, highlight your app's unique features, use consistent branding elements, and incorporate social proof like ratings or testimonials. Ensure your first few screenshots showcase your app's core value proposition.
What is the ideal text-to-image ratio for app store screenshots?
While there is no fixed rule, it is generally best to use minimal text (3-5 words per screenshot) and let visuals do most of the talking. Use a clear hierarchy with bold typography to ensure readability even when screenshots appear in search results without expansion.
How important is testing screenshots across different devices?
Testing across multiple devices is crucial to prevent issues like cropping, misalignment, or poor display on certain screen sizes. Use tools like Xcode simulators or specialized platforms to preview your screenshots on various devices before submission to avoid potential rejections.
References
[1] - https://butterkit.app/docs/science-effective-app-store-screenshots/
[2] - https://developer.apple.com/design/human-interface-guidelines/app-icons
[3] - https://www.apptweak.com/en/aso-blog/how-to-optimize-your-app-screenshots
[4] - https://redboxmobile.com/blog/5-tips-for-designing-great-app-store-screenshots-with-examples-2020-09-22/
[5] - https://appradar.com/academy/app-store-listing-visuals
[6] - https://thisisglance.com/learning-center/how-do-i-create-consistent-visual-hierarchy-in-mobile-apps
[7] - https://splitmetrics.com/blog/app-store-screenshots-aso-guide/
[8] - https://www.mobileaction.co/guide/app-screenshot-sizes-and-guidelines-for-the-app-store/
[9] - https://www.linkedin.com/pulse/designing-app-store-screenshots-tell-story-drive-installs-denis-rutoh-8ubjf
[10] - https://www.designmonks.co/blog/app-screenshot-design-examples
[11] - https://thisisglance.com/learning-center/how-do-i-make-the-best-app-screenshots-for-the-store
[12] - https://asomobile.net/en/blog/screenshots-for-app-store-and-google-play-in-2025-a-complete-guide/
[13] - https://blog.appmysite.com/mobile-app-ui-the-art-of-balancing-graphics-and-text/
[14] - https://www.appsflyer.com/blog/tips-strategy/app-store-screenshots/
[15] - https://www.interaction-design.org/literature/topics/visual-hierarchy
[16] - https://www.nngroup.com/articles/visual-hierarchy-ux-definition/
[17] - https://reteno.com/blog/a-guide-to-mobile-app-branding-actionable-tips-strategies-and-examples
[18] - https://developer.apple.com/design/human-interface-guidelines/branding
[19] - https://developer.apple.com/app-store/marketing/guidelines/
[20] - https://www.apptweak.com/en/aso-blog/app-screenshot-icon-video-guidelines-ios-gp
[21] - https://smadex.com/best-practices-for-app-creative-by-apptweak/
[22] - https://radaso.com/blog/how-to-boost-mobile-app-rankings-using-app-rating-prompts
[23] - https://www.apptweak.com/en/aso-blog/app-store-reviews
[24] - https://www.teleprompter.com/blog/visual-social-proof
[25] - https://screenshotwhale.com/blog/app-store-images
[26] - https://appfillip.com/blog/app-store-screenshot-best-practices
[27] - https://thisisglance.com/learning-center/how-do-you-test-apps-on-different-devices-and-operating-systems
[28] - https://appscreens.com/
[29] - https://theapplaunchpad.com/
[30] - https://point.co/how-to-optimize-ios-apps-for-multiple-screen-sizes-and-resolutions/
[31] - https://passion.io/blog/15-point-app-store-submission-checklist-that-gets-passion-io-apps-approved-fast
[32] - https://screenshotwhale.com/blog/app-store-screenshot-requirements
[33] - https://alconost.medium.com/manage-app-screenshot-95741a51be6b
[34] - http://tisunov.github.io/2015/11/06/automating-app-store-screenshots-generation-with-fastlane-snapshot-and-sketch.html
[35] - https://www.runway.team/blog/how-to-upload-assets-using-the-app-store-connect-api